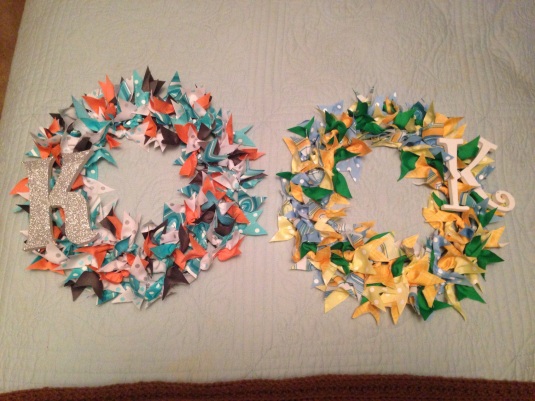
A few weeks ago, I joined a Pinterest-inspired Meet-up group. Basically, someone finds a cool craft project idea on Pinterest and then we all come together and make it! I have to admit, I’ve only been once. But it’s a start 🙂 I chose to go to an event that was a little open-ended, we were all supposed to pick a wreath project of our choosing to work on that day. So I went through my “craft ideas” Pinterest board to see what wreaths I’ve saved and I came across this one. It looked fairly easy… I mean, everyone can tie knots, right? So I went to JoAnn Fabrics and Michael’s and bought a TON of ribbon and two frames. I figured if I was going to try this, I might as well get the supplies to try two different wreaths. I should admit that I probably stood in front of the ribbon sections at each of those stores for a good hour. Each. I couldn’t make up my mind on what colors/themes/styles of ribbon I wanted!
I finally settled on grosgrain ribbon, because it has a little texture to it, which I thought would hold better in the knots. At Michael’s they have Celebrate It 360 brand, which is 4 yards (12 feet) of ribbon per spool. At JoAnns they have Offray brand ribbon, which is only 3 yards (9 feet). Both brands are 1 1/2″ wide, which was important to me. I went overboard with how many spools I bought, partly because I got a few extra colors because I couldn’t make up my mind, and partly because I didn’t know how much material I would need. It turned out that I used a combination of Celebrate It 360 and Offray ribbons on both wreaths. On the green/blue/yellow wreath, I had five spools total with more of the longer Celebrate It 360 colors. On the teal/coral/gray wreath, I had six spools total with more of the shorter Offray colors.
Oh! And I also bought new fabric/ribbon scissors to make my job easier. And a clear hook to hang my wreaths on over my bedroom door. Because these were going to be indoor wreaths, I went with 12″ wreath frames instead of anything larger. One final tip on ribbon wreath supplies, USE COUPONS or WAIT FOR A SALE!! Each of these spools was $4 or $5, plus the $3 frame and this would add up fast! I got all of mine when stores were having 40% off their ribbon collections, which brought the prices down to $2.40 and $3, respectively. This meant that my wreaths were right at $20 each for the supplies, and not including the scissors which I now own and were $15.
But enough logistics, let’s get to the fun stuff! The first decision was how long to cut each strip of ribbon. I didn’t have a ruler with me at the meet-up (typical rookie) so I measured across the center of the wreath. That seemed too big, so I went across two of the spokes of the frame. It made a ribbon length that was maybe… 6 inches? 7 inches? Somewhere in there. It’s really up to you what you think will work. You need the ribbons to be long enough to tie, but not to long to flop over… unless you want that look!
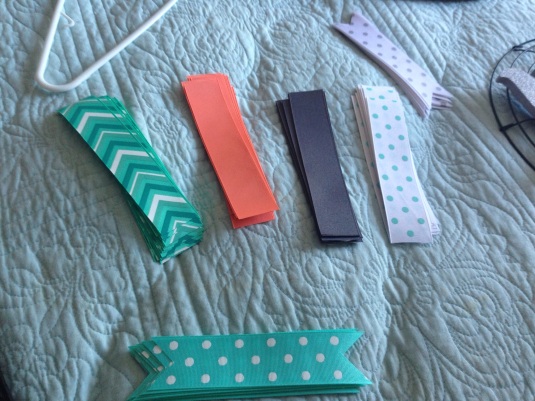
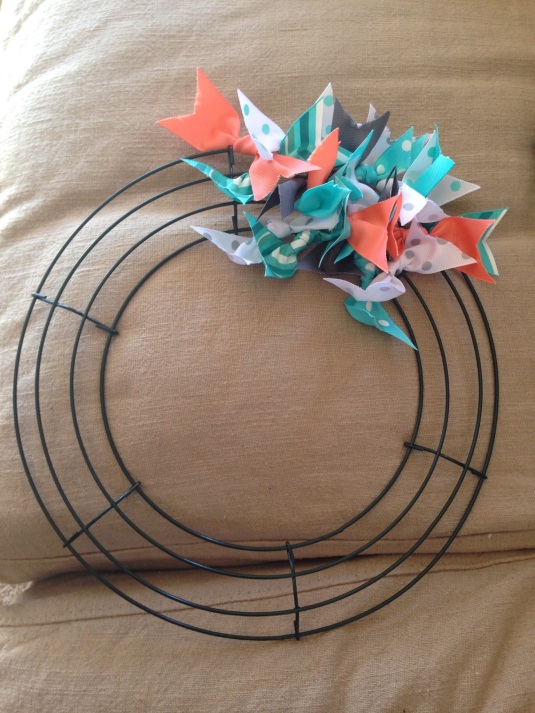
The second decision I made was what to do with the ends of the ribbon once they were cut. I tried a few varieties: straight across, angled, and wedged. I personally liked the tips that were wedged, coming in from both sides to a point in the middle (see strips above). On the first wreath, I cut and tied as I went but on the second wreath I decided to cut all the strips first since I “knew” what I was doing. After that, I just picked a quadrant… really just a one-sixth section of the wreath and started with the knots. I decided on both wreaths to just do a mix of colors throughout so I tried to separate the similar tones and mix in the pops of color. I do love the patriotic wreath from Pinterest that looked like a flag and I would consider doing a pattern of sorts in a later attempt. But for my rookie projects, I went with a nice mix. I found that on average, I could tie five knots on the outer ring, four on each of the middle two rings, and three on the inner rings. I also learned that I could switch up which direction I tied the knots in the vary the direction of the tips. So sometimes the right tail went over and sometimes it went under. I did not alternate in a direct pattern or format, just as I felt the tips needed variety.
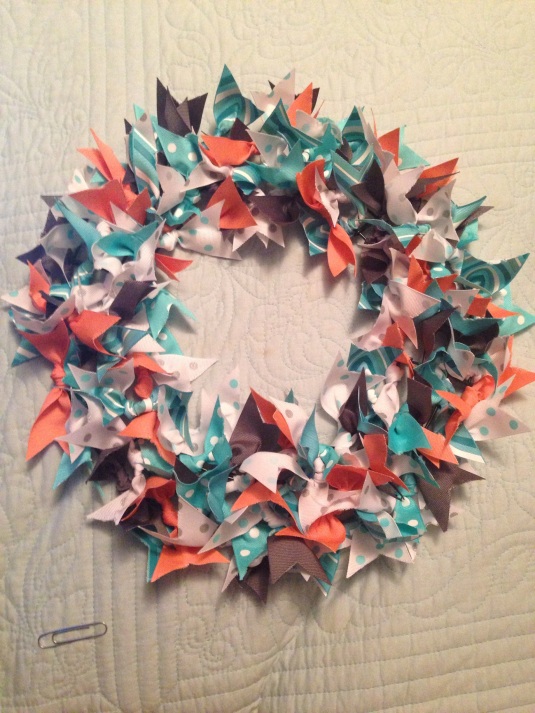
I won’t lie to you, this was not a fast process. The cutting of the ribbon wasn’t too bad, I probably knocked it all out in 30-45 minutes. The knots took probably 20 minutes per section, or two hours for the whole wreath. Again, it’s up to you how full or packed in you want the ribbons. I left them a little loose so the tips could really be seen. I did try to cover the frame from sight, just to make it appear finished and clean. After I got all the way around, I went back and fluffed, checked for holes, etc. and added a few additional strips here and there. Another note on ribbon choice, several of my ribbons had patterns (dots, stripes, chevron…) but that is obviously only printed on one side of the ribbon. When making knots, I would flip the patter into the inside and then pull the tips up in a cupped appearance so the patter would be seen. That’s me being OCD but I will say that the solid color ribbons were way easier in that regard as you didn’t have to keep track of the “front” of the ribbon when making the knots.
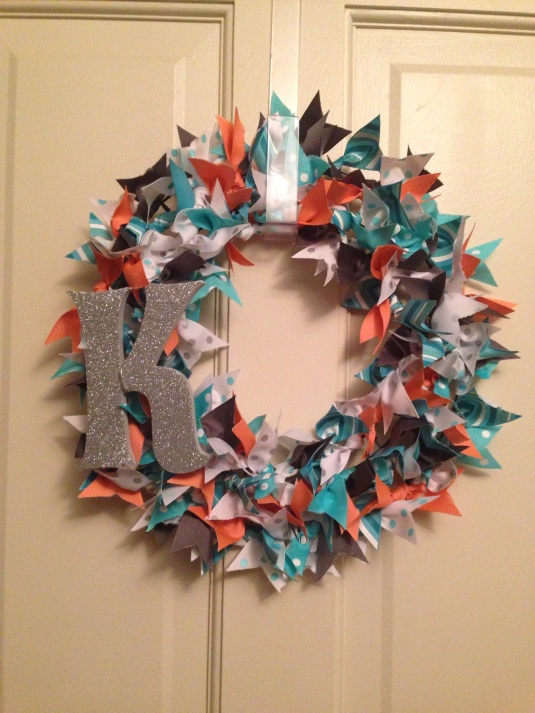
Finally, I decided to top the wreaths off with a signature “K” since they were going to be hung on my bedroom door. Luckily for me, my first initial is a letter that has appendages so this step was easier for me than it might be for you. I was able to take a regular paperclip (white on the green/blue/yellow wreath, silver on the teal/coral/gray wreath) and just wrap it around the letter and the section divider on the wreath frame. It stayed on the first try both times! I can adjust it if needed and I didn’t pull too tight to smash the ribbons behind it. I went with colors that complimented the ribbons and colors that were available at Michael’s. I think each letter was $3, the white one is wooden and the silver one is foam. They both work, giving the green/blue/yellow wreath a preppier look while the teal/coral/gray is a little more playful.
I’m sure that I could be more creative with knot ribbon wreaths in the future, but for my first attempts I am pretty happy! Like I mentioned before, on my next one I would try a pattern of sorts, possibly even divide the colors up into the six sections of the wreath frame and color block around. That might really work for a Halloween wreath with blacks and oranges and whites. You could also use burlap ribbons but I would not recommend satin, just because they won’t hold their shapes as well. I’d play with the tips too, for variety. And you could really add whatever embellishment you wanted, a Christmas tree, Easter eggs, stars, etc. Just have fun with it! And remember that the best part about these knot ribbon wreaths is that you can untie any “mistakes” you think you made and try again. Parents, this would be a fun project for kids too. Once they are of knot-tying age. You could prep the ribbons (if you left the edges flat or just at an angle cutting goes much faster) and then let them go crazy with knots.
